Enterprise Mobility : In the land of NDES – Where one eye is King and you need to watch your CRL Delta files
I was doing a EMS POC and deployment of certificates on mobile devices was a requirement. So I needed to setup an NDES server with a separate Subordinate CA for MDM , NDES Server and SCCM Certificate Registration Point (CRP). Big deal I thought as I did it a already multiple times. At my customer we worked close with the server team and setup the infrastructure which was working fine at first sight.
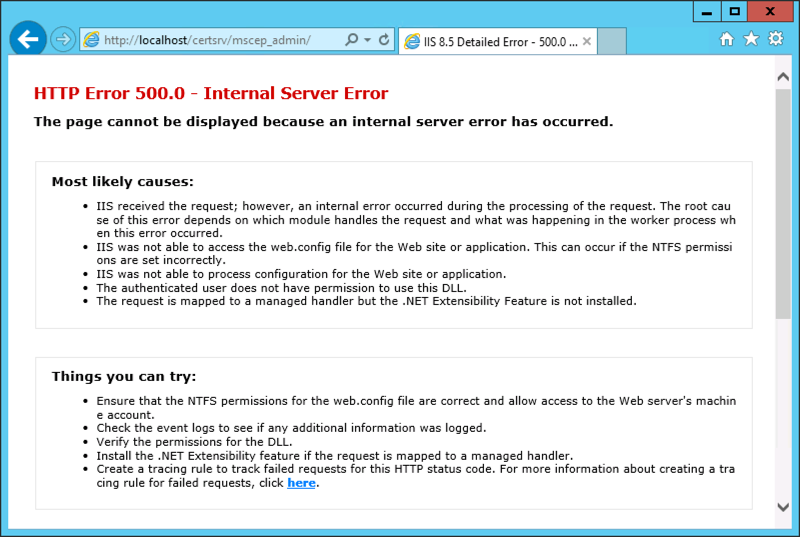
After a reboot of the NDES server I was struggling to get the Network Device Enrollment Service (NDES) up and running again as it would throw me an error 500.
The event log of the NDES Server told me the following:
The Network Device Enrollment Service cannot retrieve one of its required certificates (0x80070057). The parameter is incorrect.

The Network Device Enrollment Service cannot be started (0x80070057). The parameter is incorrect.
When the service starts, it searches for two certificates that are used by the service :
1. The service searches in the machine MY store AND
2. The certificate must have the following extensions AND
For the Key Exchange certificate:
– ExtendedKeyUsage: “Certificate Request Agent”
– KeyUsage: Encryption (0x20)
For the enrollment agent certificate:
– ExtendedKeyUsage: “Certificate Request Agent”
– KeyUsage: Signature (0x80)
3. The certificate must not be archived AND
4. The computer must have the private key for the certificate AND
5. The certificate must be issued by the same CA that the service is configured for AND
6. The certificate must have a valid chain AND
7. If there is more than one certificate for either of the certificates that meets the previous criteria, the service will select the most recent one (the latest that was issued)
Troubleshooting certificate issues will require you to enable the CryptoAPI 2.0 Event Logging :
The CryptoAPI 2.0 Diagnostics is a feature available from Windows Server 2008 that supports the trouble shooting of issues concerned with:
– Certificate Chain Validation
– Certificate Store Operations
– Signature Verification
Enable CAPI2 logging by opening the Event Viewer and navigating to the Event Viewer (Local)\Applications and Services Logs\Microsoft\Windows\CAPI2 directory and expand it. You should see a view named Operational.Next, right-click on the Operational view and click the Enable Log menu item.
Searching the right information under the capi2 operational log :
I was quite sure, that I was able to download the CRL (Certificate Revocation List) and I double checked that by browsing to the URL ‘.crl”>http://pki.xxx.be/CertEnroll/<NameOfYourSubCA>.crl’ and I was able to download the file. When digging deeper in the eventID’s , I found at EventID 42 , the following URL ‘.crl”>http://pki.xxx.be/CertEnroll/<NameOfYourSubCA+>.crl’ was shown. This means it was looking for the availability of the Delta CRL, which was visible on the web site of my CRL:
When I finally tried to download this CRL Delta file, it failed. I remembered myself, that IIS is treating the + sign very differently in URL’s.
I needed to set the setting “Allow double escaping” in the web.config file as shown below :
After enabling this, NDES was able to retrieve the Delta CRL file and start the service gracefully.
So if your NDES Server is throwing “The Network Device Enrollment Service cannot retrieve one of its required certificates (0x80070057). The parameter is incorrect.”, do not only check your certificates on the Server, check also your CRLs and Delta CRLs!
Hope it Helps,
Kenny Buntinx
MVP Enterprise Mobility
When deploying Windows Server 2012R2 using an Configmgr OSD Task Sequence, additional disks will be offline when the Task Sequence completes
When using a Configuration Manager OSD Task Sequence to deploy Windows Server 2012 or Windows Server 2012 R2 to a server (VM) that contains disks that are not local (such as SAN Disk), when the Task Sequence completes, the additional disks may not come online and may show as offline. Specifically in the Disk Management, the additional disks will show offline with the message:
Disk is offline due to a policy set by an administrator
If you look at my VM, you will see I have 2 separate disks that I will need in a later phase to install the backup software to the D:\ partition, residing on the other vmdk.
To resolve the issue, for the WinPE phase, the steps from KB971436 need to be added to the Task Sequence. For deployments from Operating System Images, a registry key value will need to be updated with the correct SAN policy value as shown below:
Just after the step where you apply the image, create a “RunCommand line called :”load system hive” and execute :” reg load HKUtemp "%OSPART%\WindowsSystem32ConfigSystem"”
Just after the step where you apply the “RunCommand line called :”load system hive”, create a “RunCommand line called :”Change Default SAN policy” and execute :”reg add HKUtempControlSet001HKLMSystemCurrentControlSetServicespartmgrParameters /v SanPolicy /t REG_DWORD /d 1 /f”
Just after the step where you apply the “RunCommand line called :”Change Default SAN policy”, create a “RunCommand line called :”Unload system hive” and execute :”reg unload HKUTEMP”
Next phase is to make sure that no drives will remain offline and all drives will still have the right driveletters assigned . Run a command line with : diskpart /s diskpart.txt
The contents of the diskpart.txt can be determined by yourself . Here is an example
Hope it Helps ,
Kenny Buntinx
MVP enterprise Client Management


